Contents of the guide:
- Step-by-step guide on how to add an image to an email signature
- Create your email signature with MySignature
- How to design an email signature for Apple Mail
- Explore more email signature guides for Apple Mail
If you add an image to the Apple Mail signature, you will not only personalize your emails but also add a touch of professionalism that can make a lasting impression. Whether you’re a business professional wanting to showcase your brand logo or simply looking to add a personal flair with a favorite photo, integrating images into your email signature is a straightforward process.
Follow this simple step-by-step guide to transform your email signature into a visually appealing and professional communication tool.
Step 1: Open Apple Mail
Firstly, launch the Apple Mail app on your Mac. You can find it in the Applications folder or by using Spotlight Search.
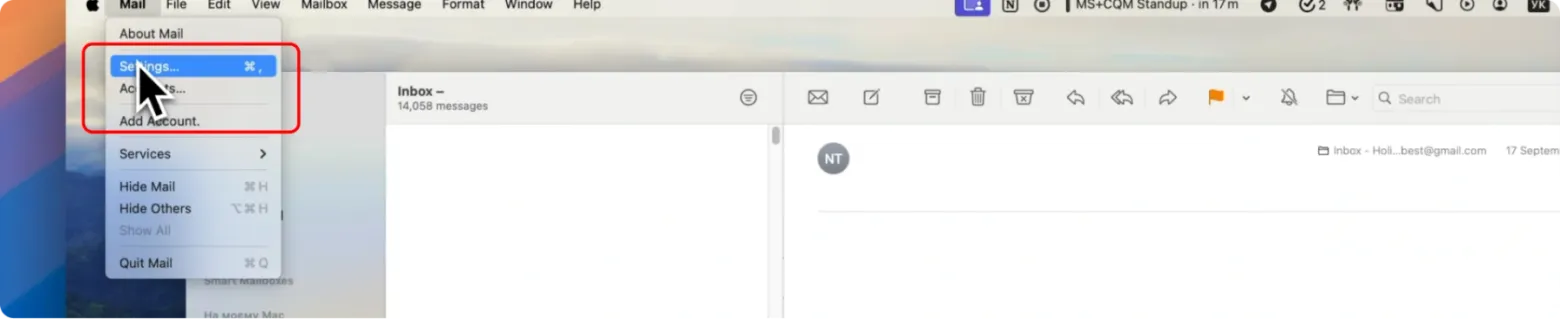
Step 2: Access Settings
In the Apple Mail menu bar at the top of your screen, click on “Mail” and then select “Settings” from the drop-down menu.
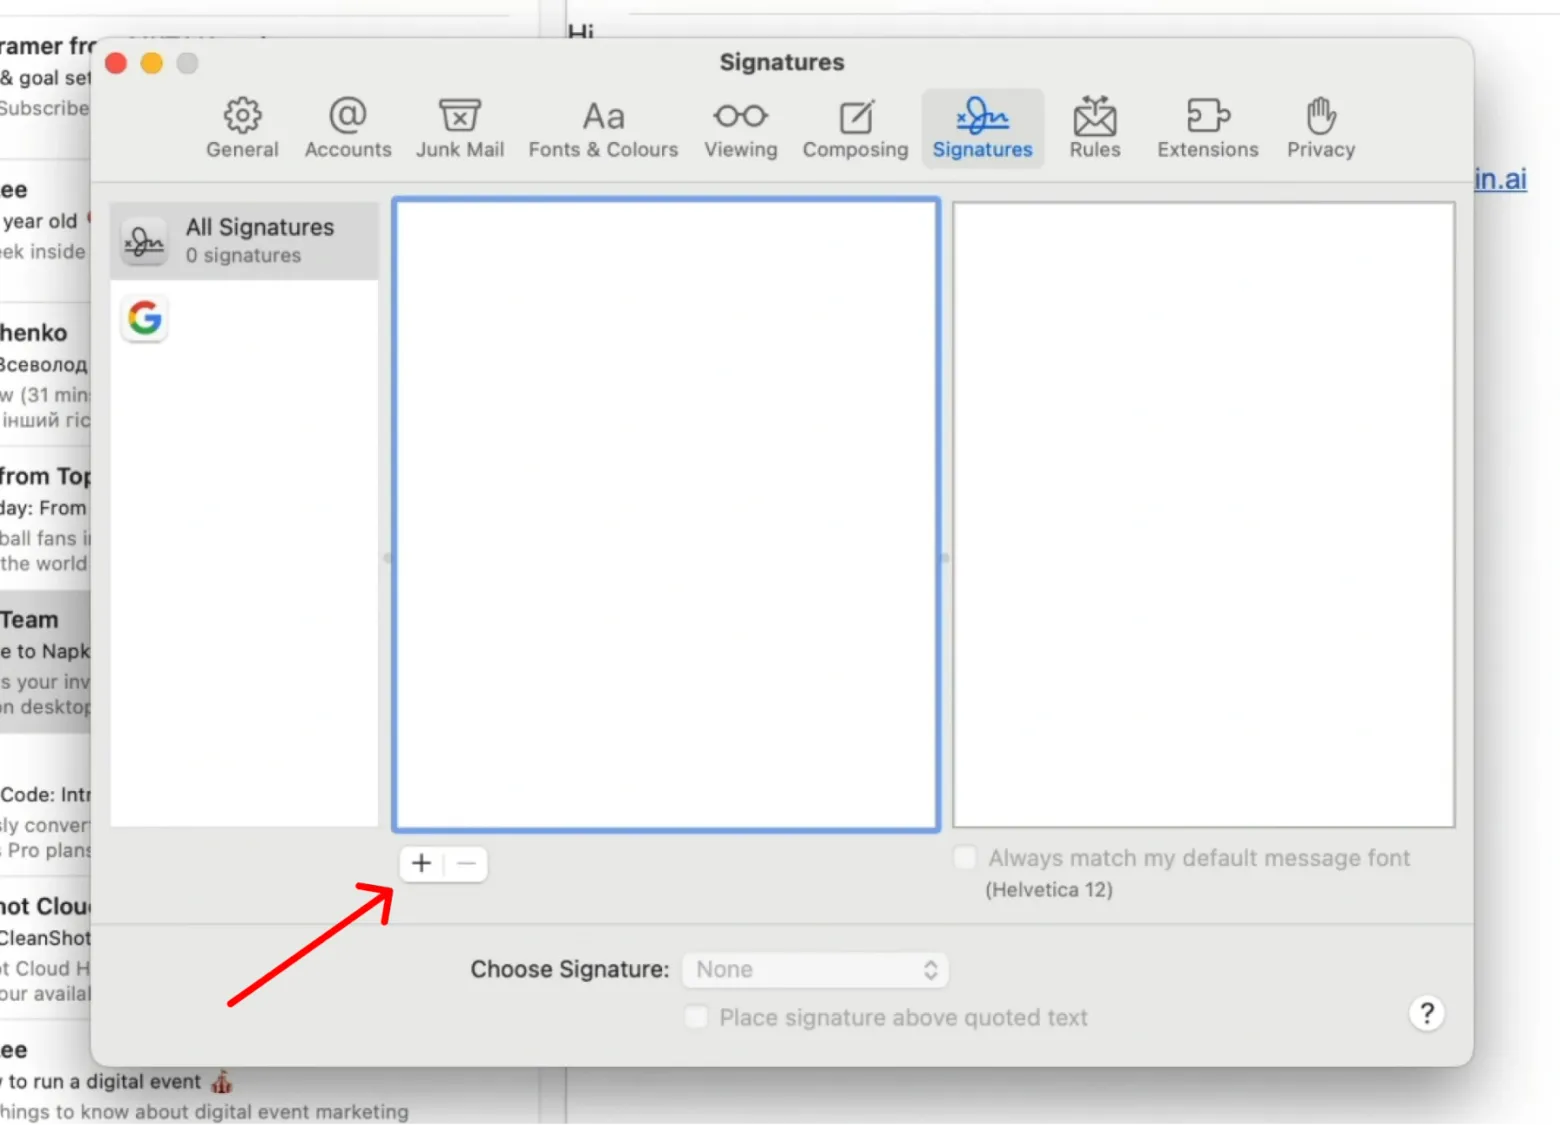
Step 3: Open the Signatures tab
Within the Settings window, navigate to the Signatures tab. This is where you will manage all your Apple Mail email signatures.
Step 4: Select the email account
In the left column, select the email account to which you want to add the signature. If you have multiple accounts, make sure to choose the correct one.
Step 5: Create a new mail signature
Click the “+” button at the bottom of the middle column to create a new signature. Name your signature in the middle column and then enter the desired text in the right column.
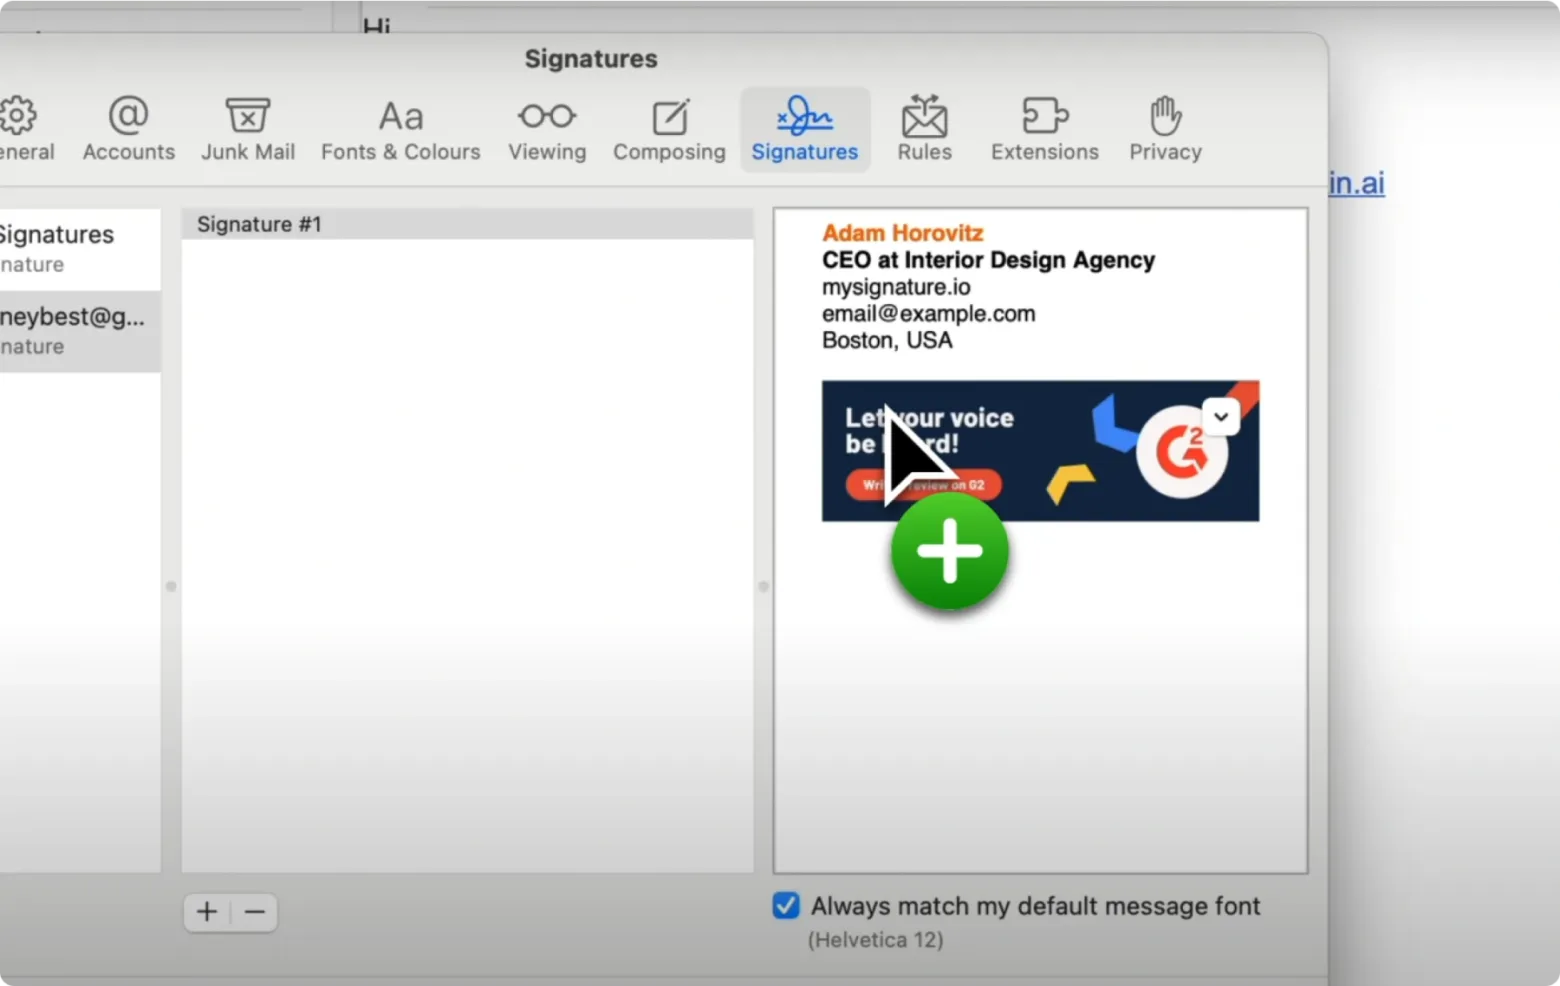
Step 6: Add the image
To add image to Mac Mail signature, find the image you want to insert using Finder. Drag and drop the Apple Mail signature image into the text box in the right column of the Signatures tab. Alternatively, you can copy the image (Command + C) and then paste it (Command + V) into the signature field.
Step 7: Resize the image
If necessary, resize your future Mac Mail signature image to fit nicely within your signature. To do this, open the image in Preview, go to Tools > Adjust Size. We recommend adding pictures that are quite small, ideally less than 100kb. If your image is larger than that, it will be a problem and may not be available for download.

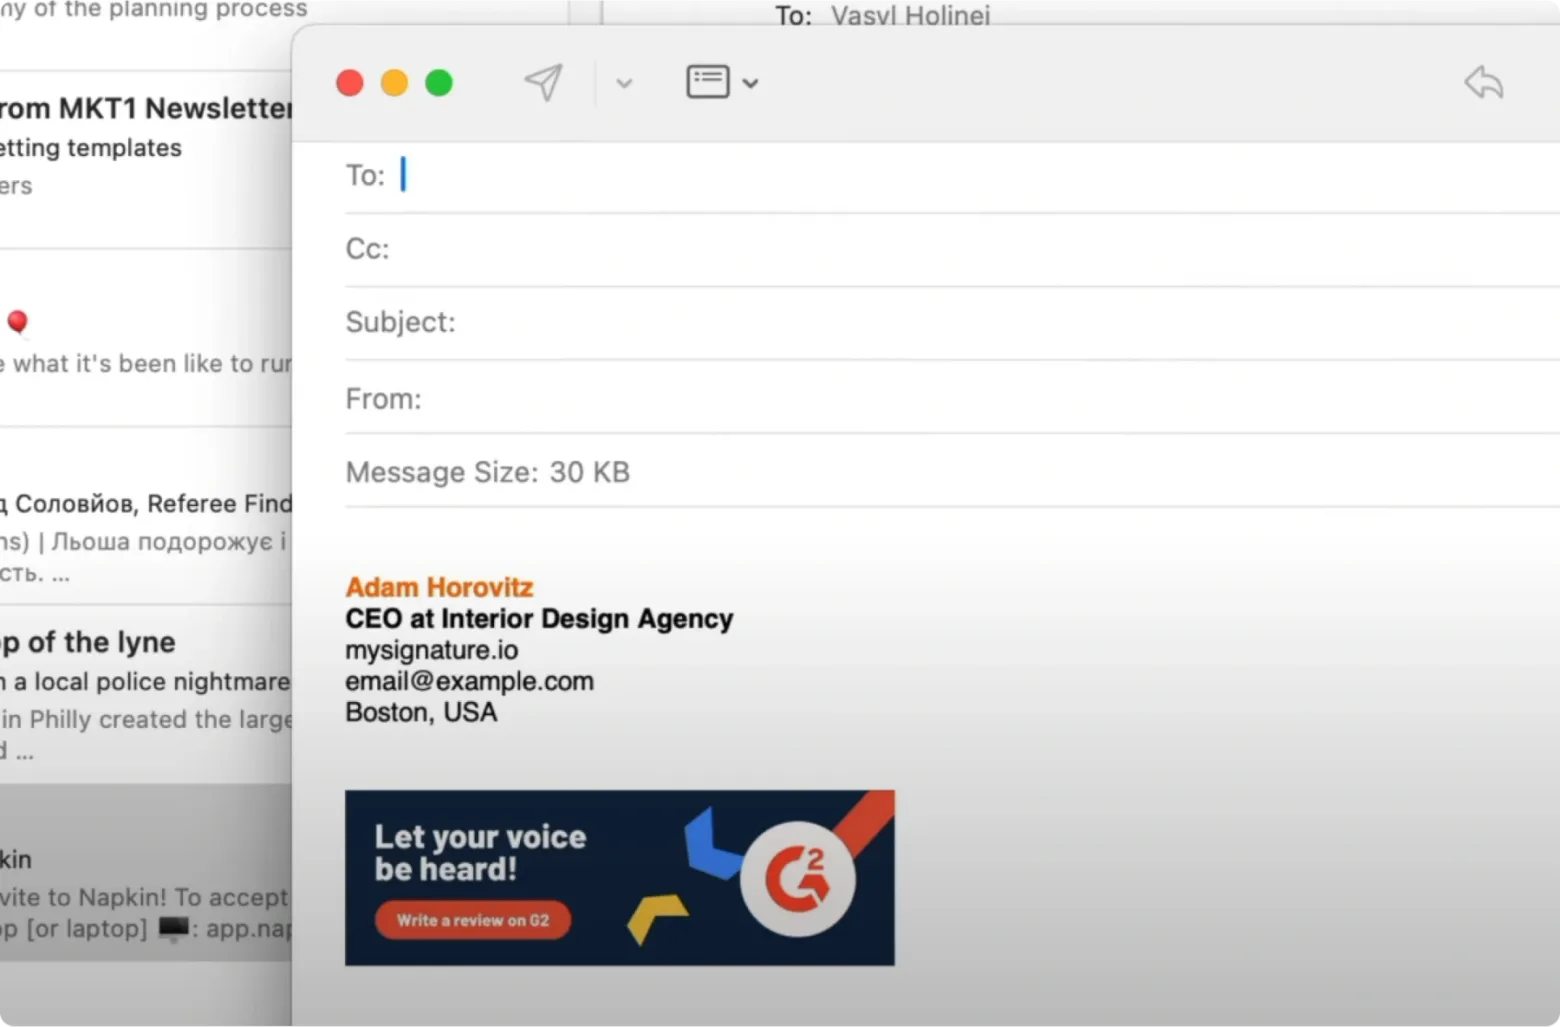
Step 8: Test your signature
Now you know how to add image to Apple Mail signature. But that’s not all. Try to compose a new email to test if everything works right. If there are any issues, return to the Signatures tab and make the necessary adjustments.

Ready to create your email signature?
Apple Mail’s default signature editor can be limiting. For a more polished look, consider using MySignature. This tool offers an array of pre-made templates and an intuitive editor, helping you create a signature that truly represents you and your organization professionally.
Create your first email signature now!How to design an email signature for Apple Mail
Want to make your Mac Mail signature stand out? Watch our video and discover the secrets to creating a sleek, professional email signature that leaves a lasting impression.