Last Updated on 06.03.2025 by Danylo T
Tired of junk mail? All it does is clog the Mail app and take up space on your iPhone. While Apple moves spam to the Junk folder, those emails don’t disappear right away. Below, we will show you how to get rid of junk mail on your iPhone in a few taps and also talk about some other tricks and tools you can use to keep your iPhone storage tidy.
How to Delete Specific Junk Mail on iPhone
As stated on the official Apple Support page, “Most junk mail (spam) sent to your @icloud.com address or its aliases is automatically identified and moved to your Junk folder.” And, of course, as you probably know, if some unwanted mail wasn’t caught, you can move it to Junk yourself.
But that’s not the end of the story. Those emails still exist for up to 30 days, taking up space unless you delete them manually. If you want to clean up your Mail app right now, here’s how to remove specific junk emails on your iPhone:
- Open the Mail app on your iPhone.
- Scroll down and select Junk.
- Find the email you want to remove.
- Swipe left and tap Delete.

This removes the email from the Junk folder and sends it to the Trash, where it stays until permanently deleted.
How to Permanently Delete All Junk Mail on iPhone
That was pretty simple, right? But what if you have hundreds of junk emails sitting in the folder? Deleting them one by one could take way too long. Instead, you can clear everything at once in just a few taps.
Here’s how to permanently delete all junk mail on an iPhone in seconds.
- In the Mail app, tap Mailboxes in the top-left corner.
- Select Junk to open the folder.
- Tap Select in the top-right corner.
- Then Select All on the left.
- Now tap Delete.
- Confirm by tapping Delete All.
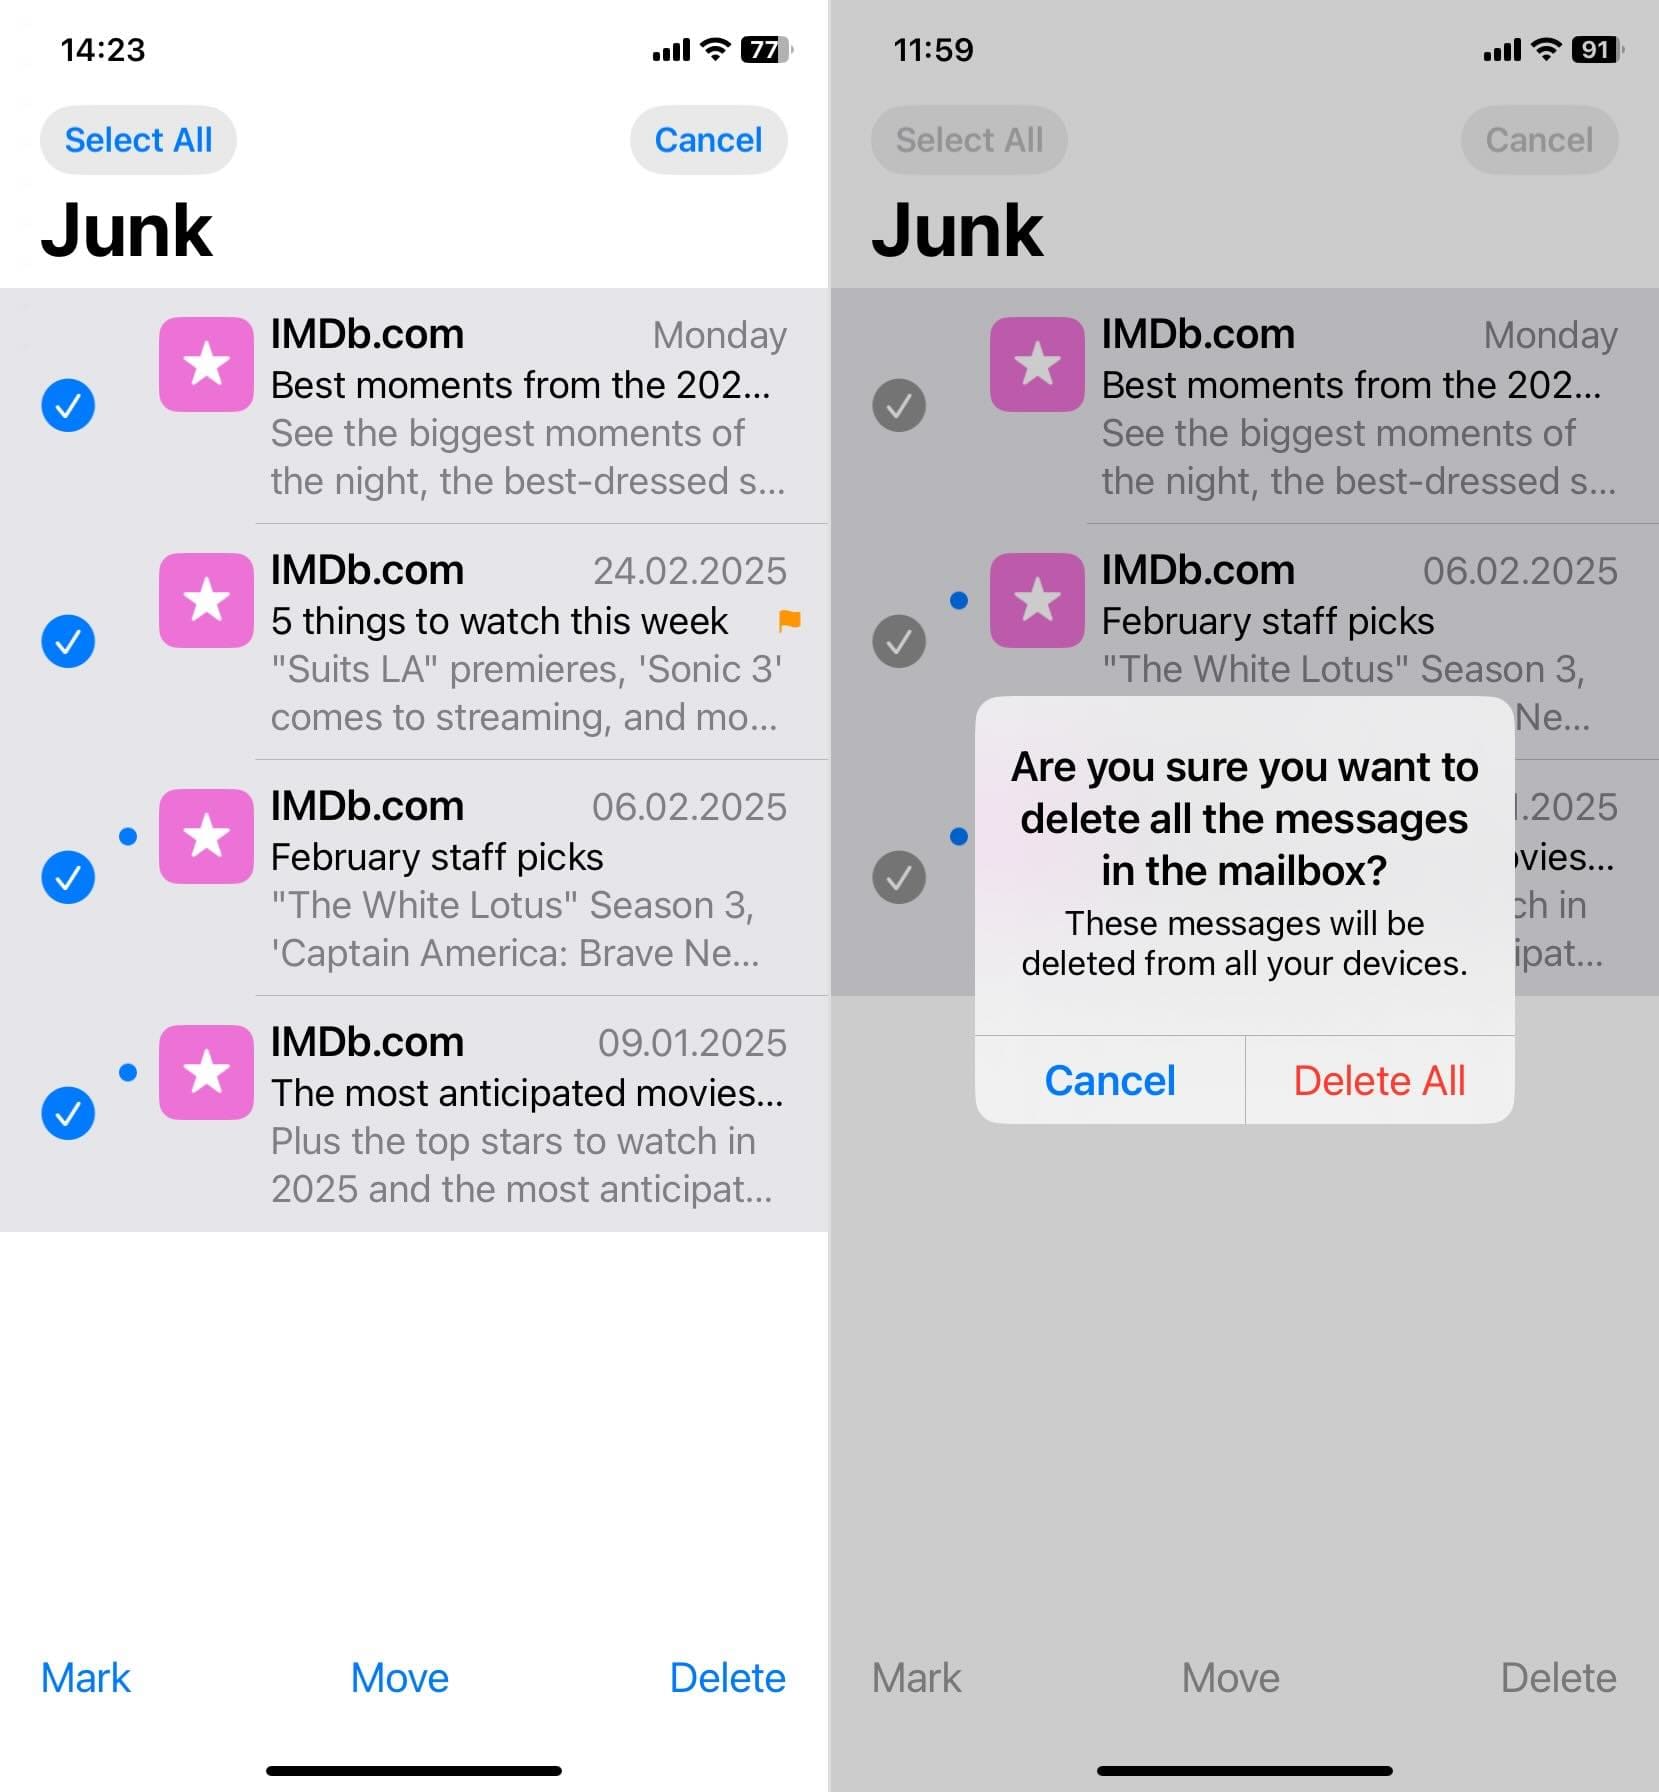
That’s it – your Junk folder is now empty.
But as we said before, when you remove an email from the Junk folder, it goes to the Trash first, where it stays for up to 30 days before it’s gone for good. If you’d rather not wait, you can delete them permanently right now.
How to permanently delete junk mail on iPhone from Trash:
- Go back to Mailboxes and tap Trash.
- Tap Select in the top-right corner.
- Tap Select All on the left.
- Tap Delete All.
- Confirm by tapping Delete All again.
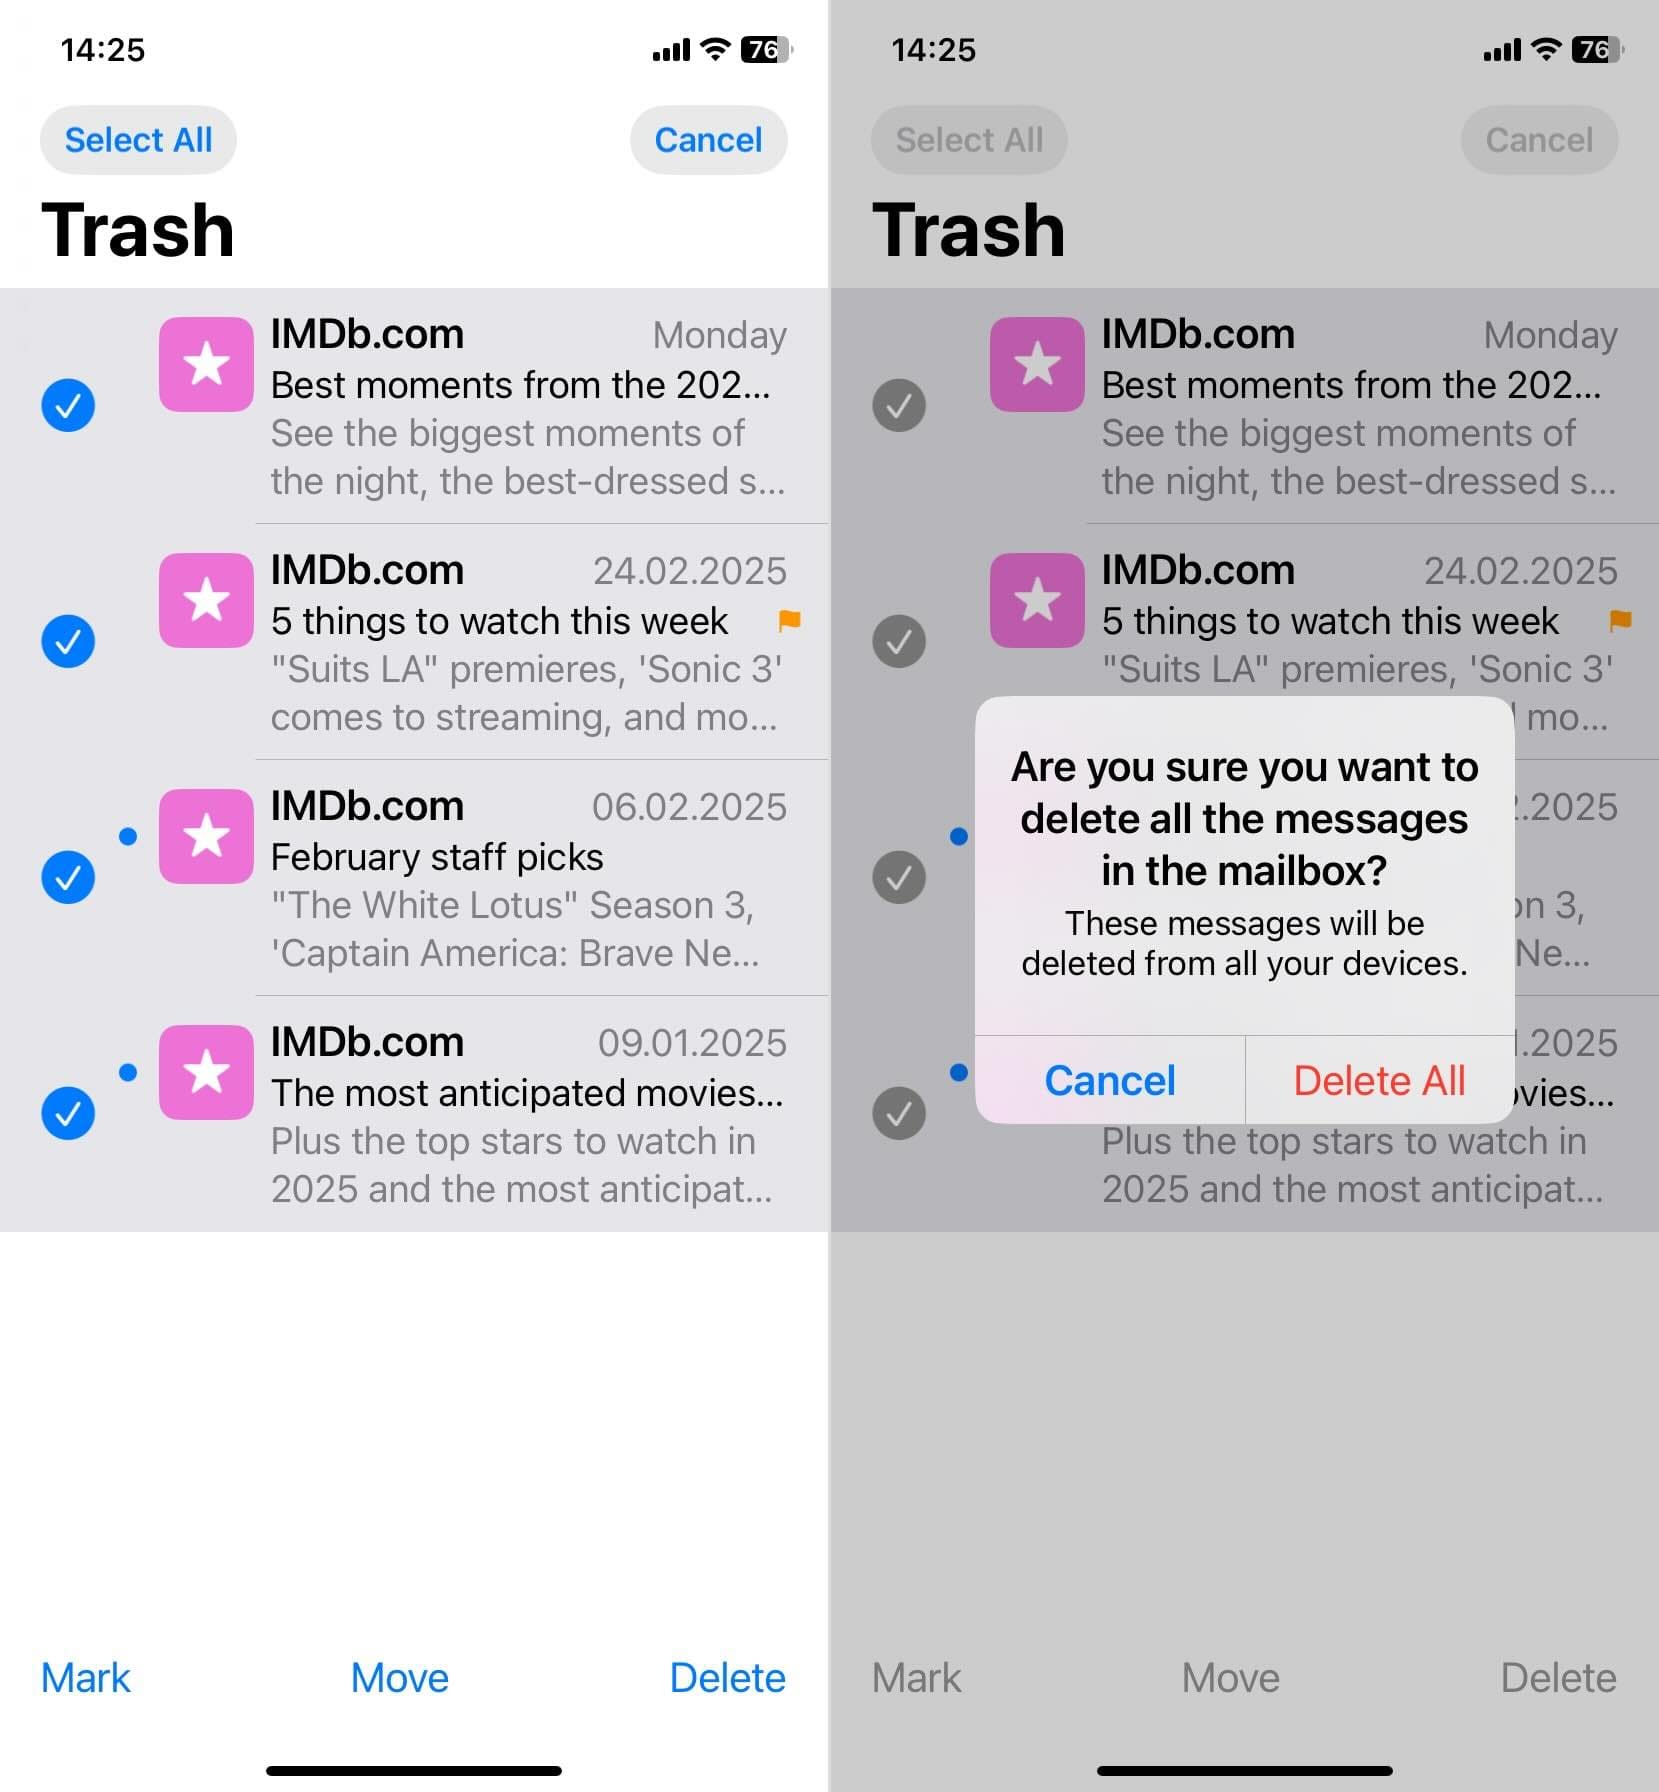
Only now, those emails are permanently deleted and cannot be recovered.
The reason why Apple’s iOS is in no rush to erase your junk mail right when you delete it from the Junk folder is that it acts as a safety net. It gives you time and makes sure you don’t accidentally delete something important with a mis-tap.
How to Find Even More Junk Files on iPhone to Clean
If your primary goal is to get your iPhone in order and delete all unnecessary junk for more breathing room, junk mail is only the tip of the iceberg. Emails typically don’t take up much space (unless you have thousands of them with large attachments). In that case, they can pile up. But there are many other places where junk files hide.
Manually cleaning everything takes time, and iOS doesn’t offer a one-tap cleanup option. To automate this process, we suggest using a cleaning app. These tools can handle most of the work and often find gigabytes of potential junk in seconds.
One of the best tools for a job like this is the Clever Cleaner App for iPhone. Unlike many so-called “free” apps that hide features behind paywalls, this one is 100% free – no subscriptions, no credit card info required. Even better, it doesn’t force you to watch ads like many similar tools.
What kind of junk can this app clean up?
- Unnecessary surplus images – It uses AI algorithms to analyze and find extra images you probably don’t need. It identifies multiple copies of the same photo and even visually similar images of the same person or object taken from slightly different angles. Instead of scrolling through thousands of photos yourself, you can remove duplicates with a tap.
- Screenshots that serve no purpose – Clever Cleaner spots all your screenshots and shows exactly how much space they’re wasting – both in megabytes and as a percentage of your total storage. You can delete them all in one tap or go through them individually if you want to keep a few.
- Live Photo optimization – Live Photos take up significantly more space than regular images. Clever Cleaner can convert them into still photos without losing quality, which saves tons of storage. Before you delete something, the app shows exactly how much space you’ll free up in real time.
- “Heavies” (large files) – Most people’s biggest storage hogs are videos. This feature makes it super easy to find your largest files; it sorts your videos from largest to smallest (something iOS still won’t let you do in the Photos app). This way, you can quickly see what’s eating up your space and decide what to keep or delete.
How to use Clever Cleaner to delete junk images:
- Launch the app and allow access to your photo library.
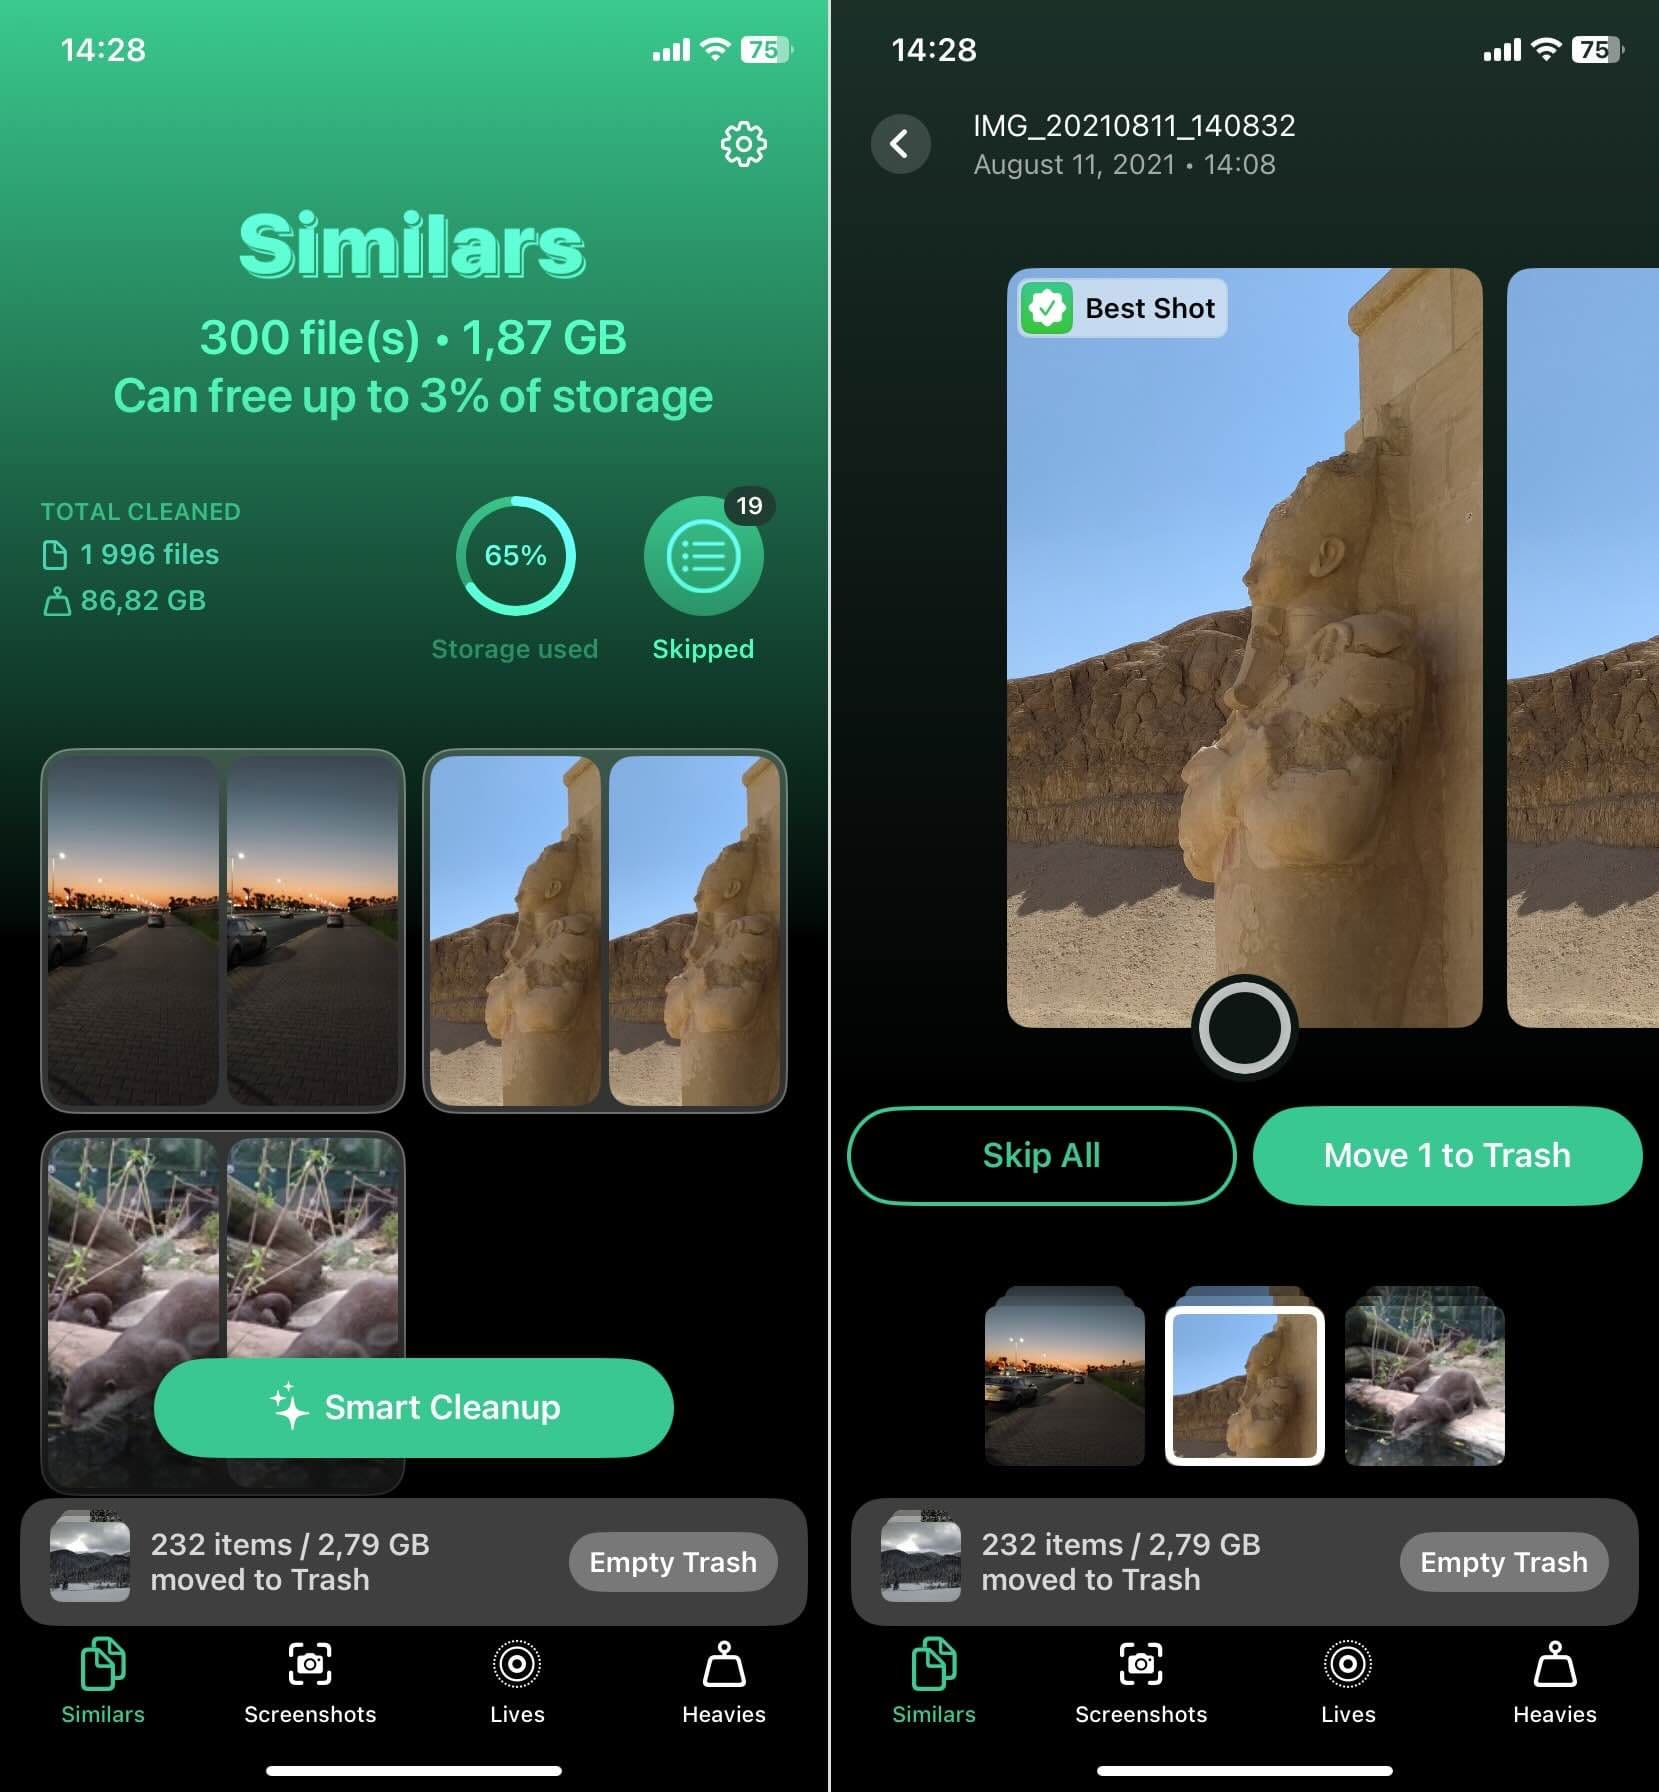
- Tap the ‘Similars’ tab to find duplicate and near-identical images.
- Tap ‘Smart Cleanup’ to let AI analyze your photos and automatically select the best ones to keep.
- The app pre-selects lower-quality or redundant images for removal. If you want to keep any, tap ‘Restore’ to deselect them.
- Swipe to confirm and remove the selected images.
- For a more selective approach, open Similars, check grouped images, and manually pick what to delete or keep.
- Once finished, tap ‘Empty Trash’ to free up space instantly.
All deleted images move to Recently Deleted, where they stay for 30 days before being permanently removed. If you need space immediately, clear out this folder manually.
There are many more ways to free up your iPhone’s storage from junk, like removing unnecessary app data and clearing cached files. We won’t go into further details here, but if you want to learn more, you can check out some of the best methods to clean junk files on an iPhone to find even more options.
How to Stop Junk Mail From Filling Up Your Inbox
If you’re getting flooded with junk mail, you’re not alone. Take this Apple Community poster, for example, who noticed that emails that should go to Junk were suddenly landing in the inbox:
“Today I noticed that junk mail that is usually in my junk folder is now showing up in my inbox, and I get a lot of junk mail. I checked the Mail preferences, and my junk filter is set to move junk mail to the Junk folder. I don’t know why it started doing this, but it makes it more likely that I’ll accidentally click on a bad email. Would like to fix this before it gets out of hand.”
This kind of issue can be quite common. While Apple’s spam filters are good, they aren’t perfect, and spam can still slip through. If you want to stop junk mail from cluttering your inbox, here’s what you can try:
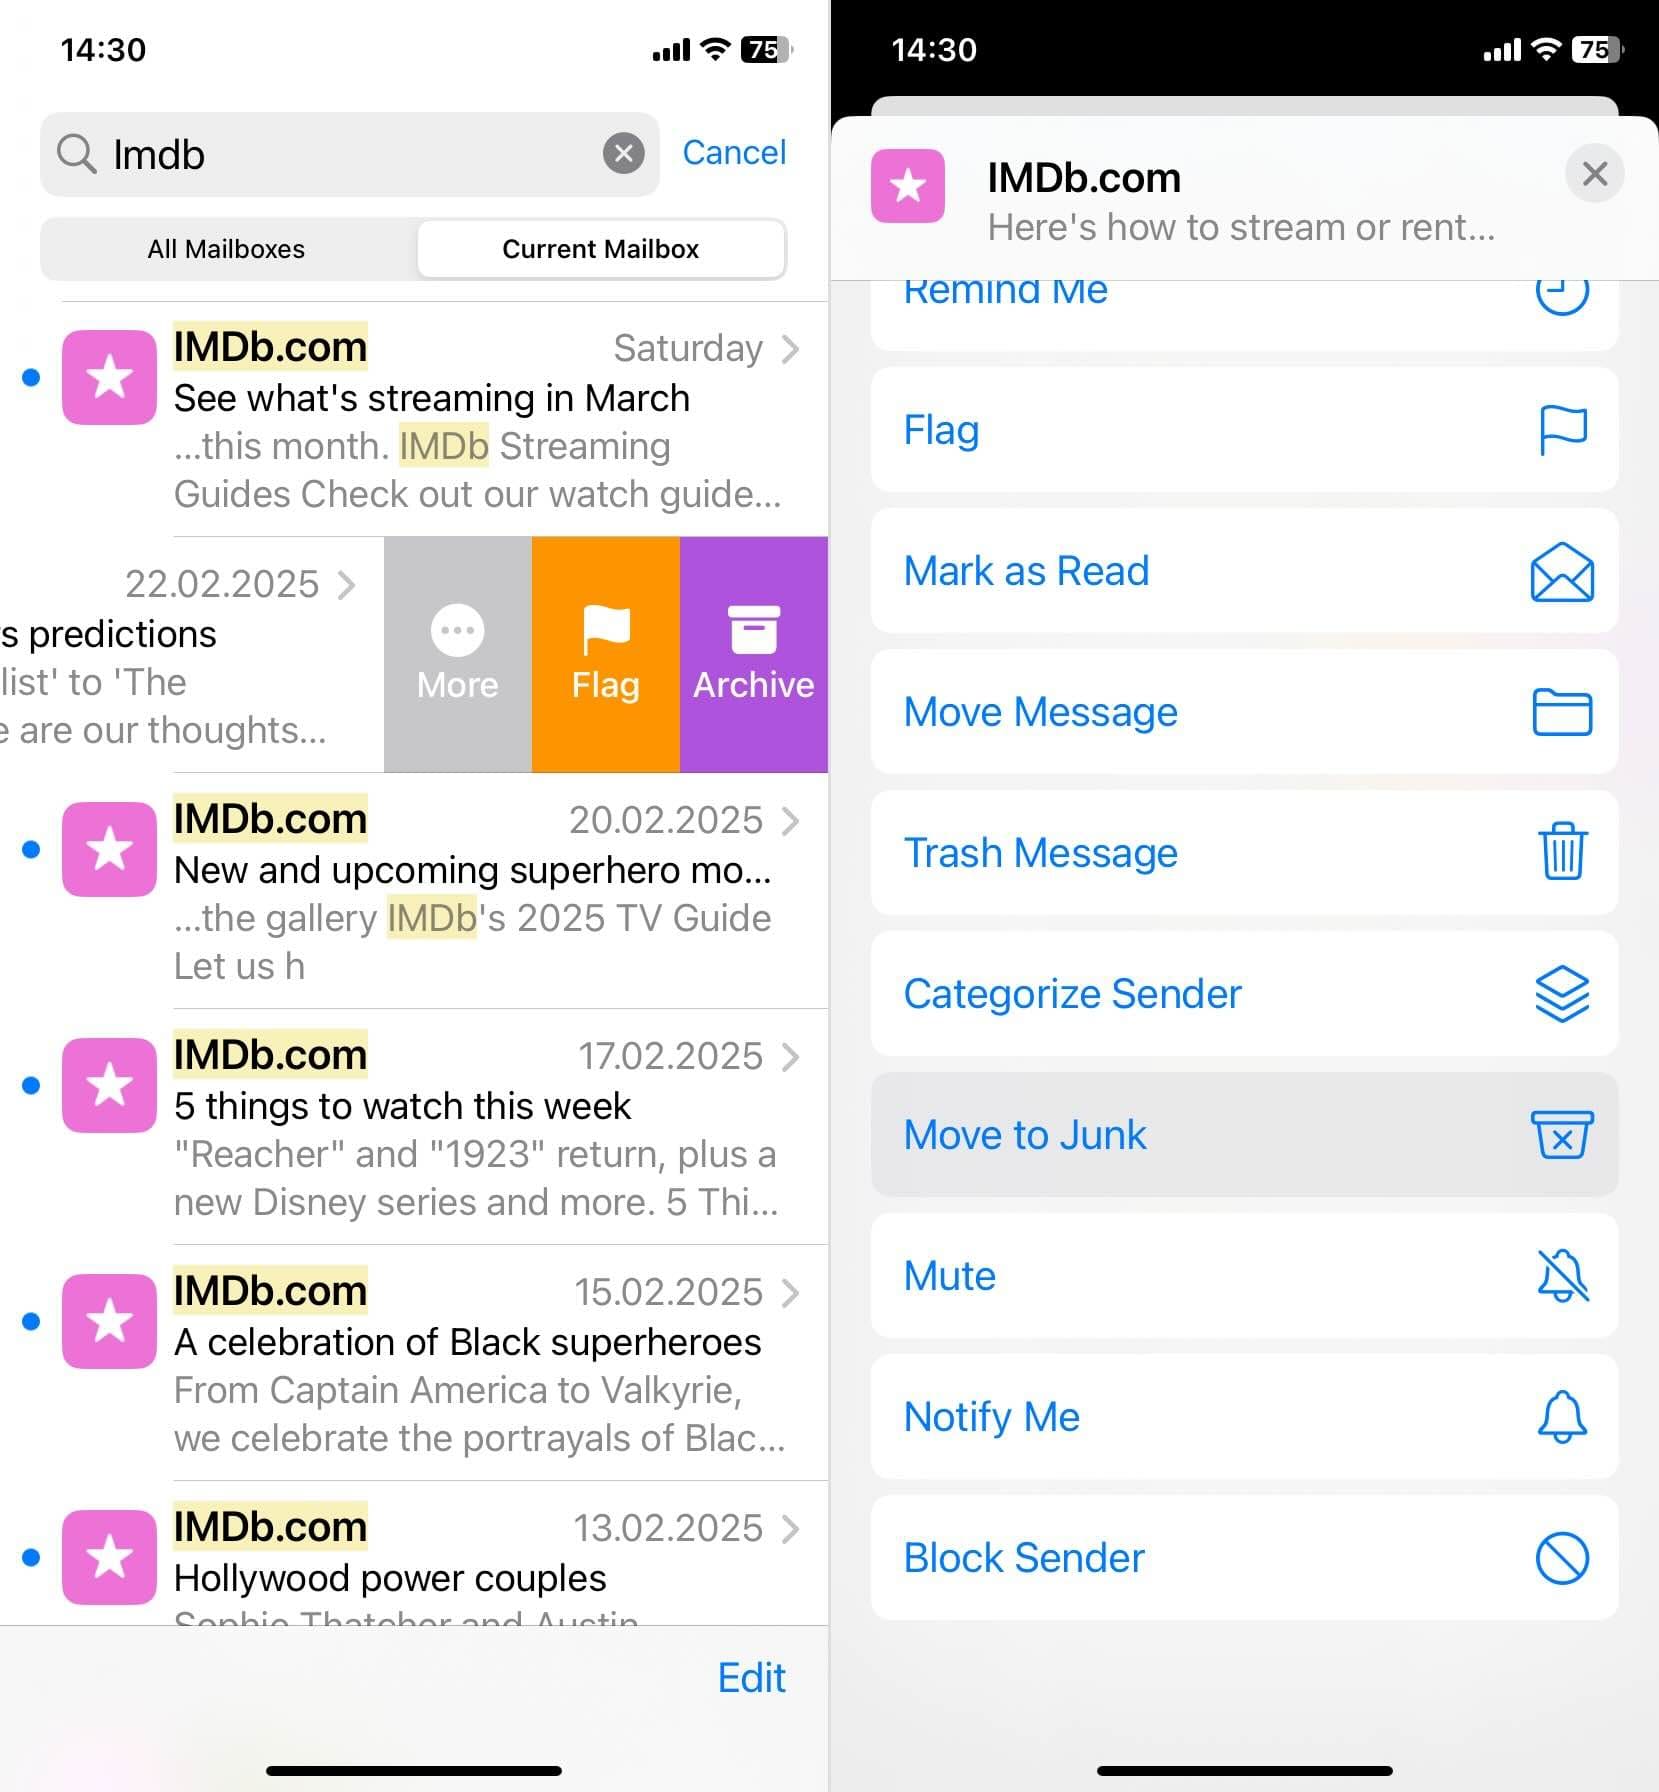
- Mark emails as Junk. The first thing you should try is manually marking junk emails so Mail learns to filter them correctly. Open the Mail app and find the junk email. Swipe left and tap More. Tap Move to Junk. After doing this a few times, Mail should start automatically moving similar messages to Junk.
- Block unwanted senders. If the same spam emails keep showing up, you can block the sender. Open the Mail app and tap the junk email. Tap the sender’s name at the top. Scroll down and tap Block This Contact. Once blocked, emails from that sender will go straight to Junk.
- Check your email provider’s junk mail settings. If junk mail is skipping the Junk folder, your email provider’s spam filters might not be working correctly. Open Safari and sign in to your email account. Find Spam or Junk Mail settings. Make sure spam filtering is enabled and rules are set correctly. Some providers, like Outlook, let you block entire domains, and Gmail allows custom spam filters.
Final Thoughts
So to conclude, it’s not that hard to get rid of junk mail on an iPhone, and while you’re at it, you can clean up other junk as well. Also, you might want to know that some people use two email accounts – one for important contacts, work, banking, and shopping, and a second for less critical stuff like newsletters, promotions, and one-time registrations. This way, if a company sells your email to spammers, your main inbox stays clean.